How to Add Custom Parts to SOLIDWORKS Toolbox

How to Add Custom Parts to SOLIDWORKS Toolbox

Summary

Learn to easily add your own hardware parts to the SOLIDWORKS Toolbox library.

SOLIDWORKS Toolbox includes thousands of hardware parts from multiple industry standards. Designers can also add custom parts to SOLIDWORKS Toolbox library specific to their company or other hardware components that may not have been included with the default installation standards. These custom parts can be saved to the Toolbox library with only a few simple steps and then accessed by your SOLIDWORKS users right from the SOLIDWORKS Toolbox in the Task Pane. 

Preparing the Custom Part

  1. Only SOLIDWORKS part files (.sldprt) can be added to Toolbox. If the file is imported from another CAD system or if it’s a neutral CAD format, the file must be saved as a SOLIDWORKS part file. 
  2. All configurations for custom part files must be created and saved within the custom file manually. Toolbox does not have functionality to modify existing or create new configurations for custom parts. 
  3. All dimensions and features must be created and managed manually within the custom part file. Toolbox only links and works with the default files included with the installation. 
  4. Custom Properties must be created and managed within the custom part file. 

Adding a Custom Part to Toolbox

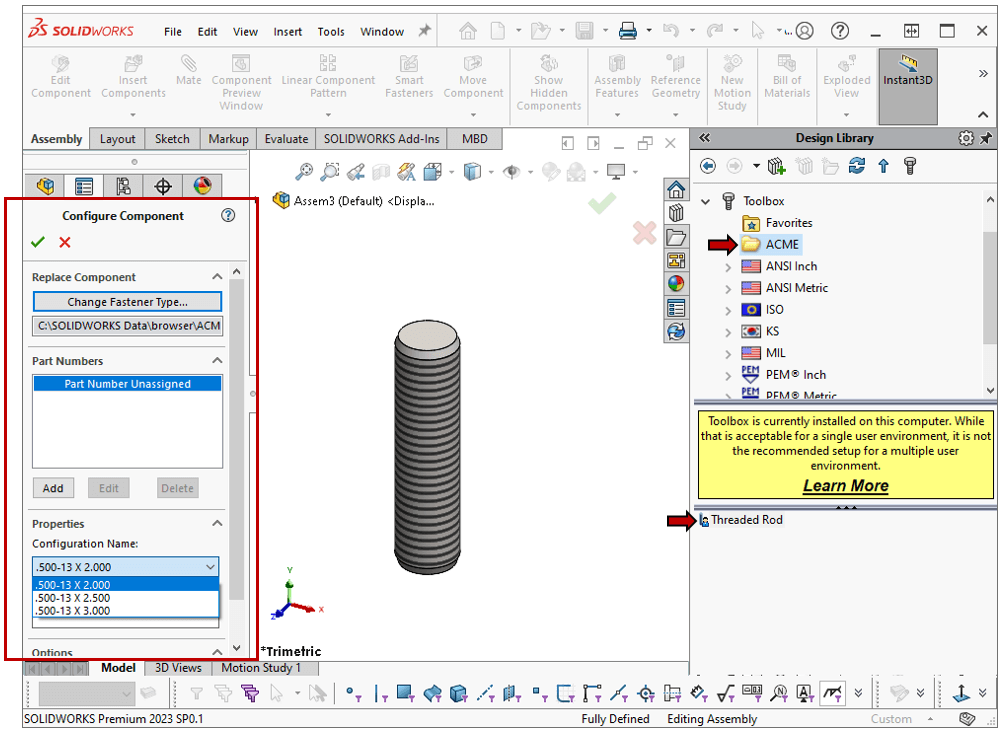
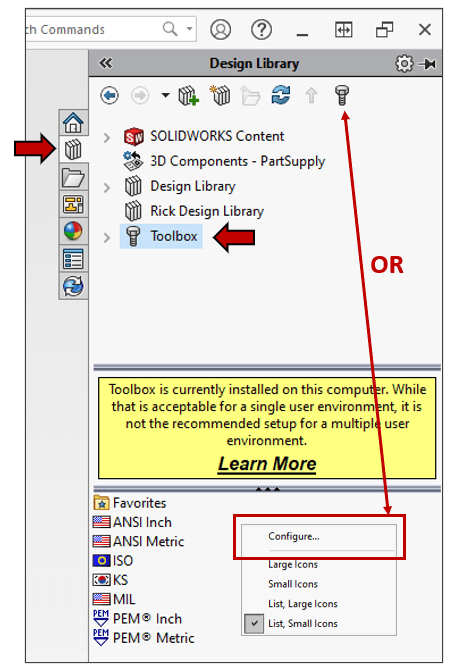
To add a custom part to SOLIDWORKS Toolbox, expand the SOLIDWORKS Task Pane on the right-hand side of the SOLIDWORKS screen, click the Library tab and expand the Toolbox category. Right-click anywhere within the Toolbox and select Configure Toolbox or click the Configure Toolbox bolt icon at the top of the Task Pane to launch the Toolbox Configuration application. 


SOLIDWORKS Toolbox configuration screen showing the configuration interfaceToolbox Configure

Note, the Toolbox Configuration can also be launched from Windows Start icon > SOLIDWORKS Tools <version> and then Toolbox Settings 

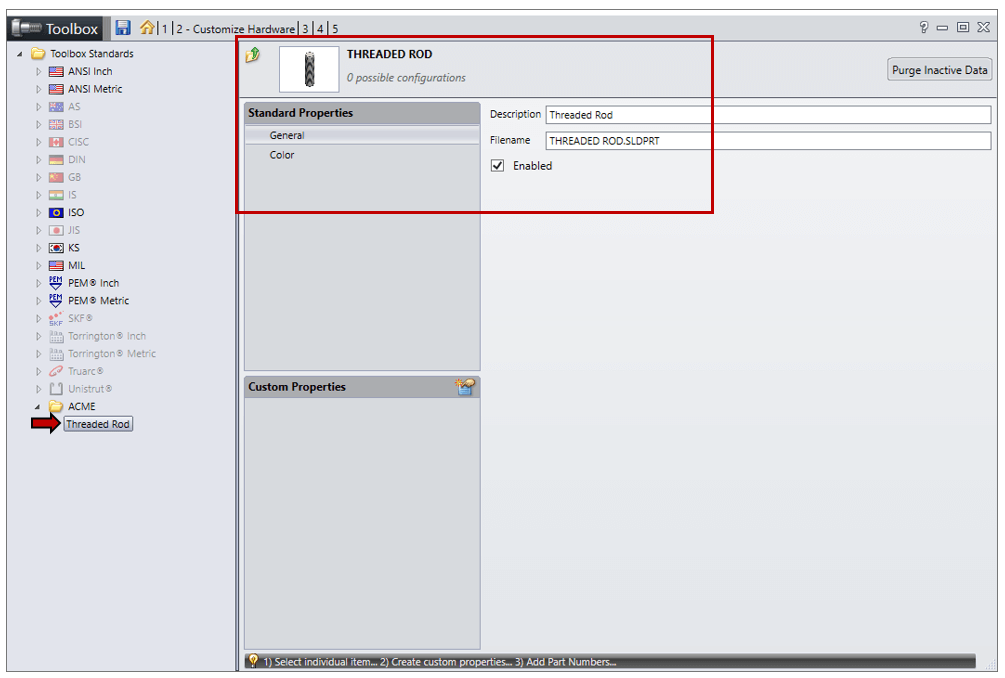
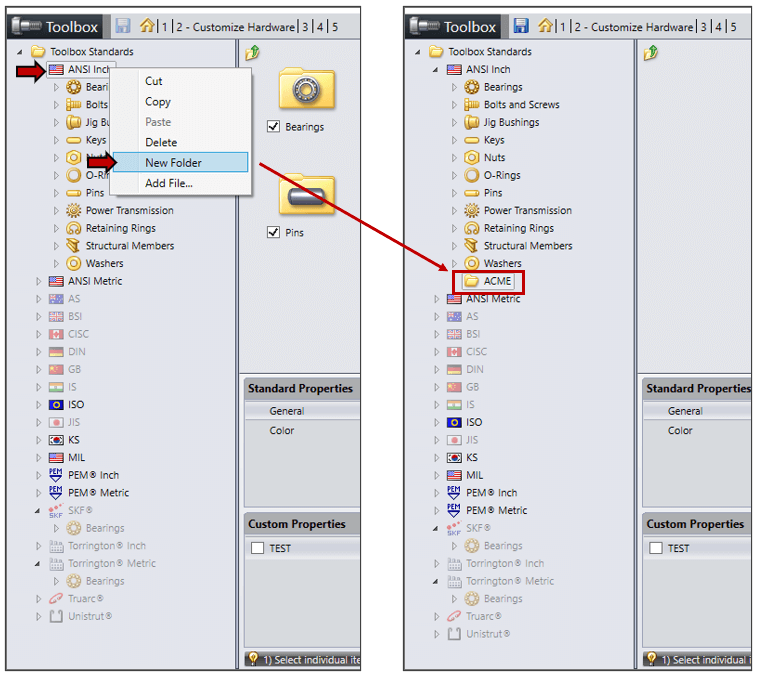
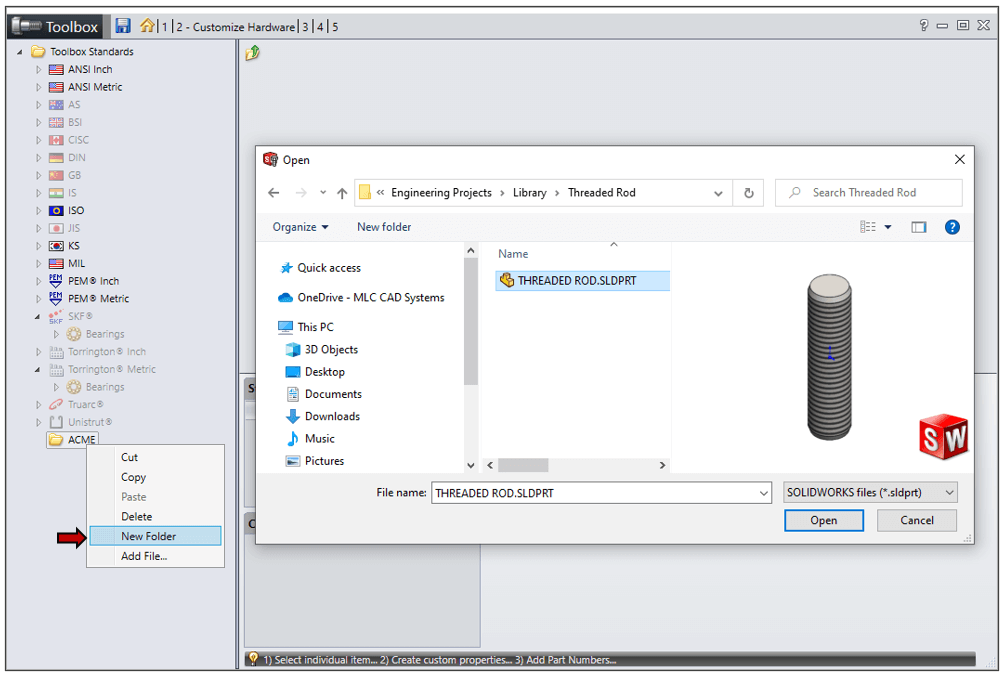
Within Toolbox Configuration, category 2 Customize Hardware, create a folder for the custom part using one of these methods: 

    • Right-click an existing standard and select ‘New Folder’. 

SOLIDWORKS Toolbox new folder creation screenToolbox New Folder

Or 

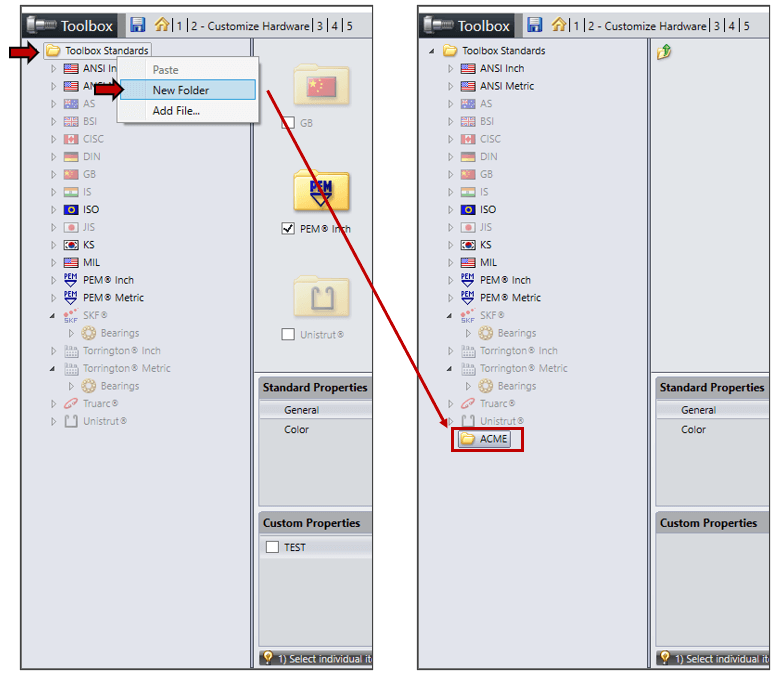
    • Right-click Toolbox Standards and select ‘New Folder’ to create a new standard folder specific to your company. A new standard folder will be created in the SOLIDWORKS Data folder. If you add a new standard, users will need to close and reopen SOLIDWORKS for the standard folder to display in the Task Pane. 

SOLIDWORKS Toolbox configure new folder screenToolbox Configure New Folder

Next, right-click the newly created folder and select ‘Add File…’. Browse to the required part file and add it to the list. Continue adding additional custom part files as needed. New files are copied to the SOLIDWORKS Data folder under the associated standard folder. 

SOLIDWORKS Toolbox add folder screenToolbox Add Folder
 

Click one of the newly added part files. General settings such as Filename, Description and other custom properties of the part can be modified. The Color settings (Appearance) of the part can also be modified. 

 
SOLIDWORKS Toolbox customize hardware screen
Toolbox Customize Hardware

Now your custom part can be added to an assembly in the same drag-and-drop manner as the default Toolbox items. 

SOLIDWORKS Design Library Toolbox screen
Design Library Toolbox
 
If you are unable to update the SOLIDWORKS Toolbox manually or encounter errors during the update process, this article will help you find the solution to the problem.
Back to All Posts solidworks Category

Admin User

Content Editor & SolidWorks Expert

10+ years of experience in SolidWorks and CAD technologies. Writes articles focused on industrial design and automation.